Polaroid Land 80A Highlander - Exposing on Paper and 120 Film Conversion

Never one to hesitate to try new camera mods, and having recently gotten smitten by the cheap large format alternatives and characteristic lenses that older Polaroid camera models offer, I have had the opportunity to try the Highlander.

The Polaroid model 80A was the smaller alternative Polaroid instant camera sold in the early 1950s. It produced 6x9 cm peel-apart photos that developed inside the camera. The film was made up of one negative which was squeezed together with one layer of chemicals. Analog Resurgence recently posted an informative video of the history of the roll-film Polaroids.


You expose for the EV value (see '11' inside the little square window).

I bought mine for a bargain price via the Swedish major auction site. Well, a bargain for someone who knows what the camera can do. Most people just think it obsolete and useless. I had done my research, in part preparing for my other Polaroid mod with the pack-film cameras. My intention for this camera was to convert it to take rollfilm in medium format. There are several tutorials on how to do it out there.

First exposures, on paper and film

Before conversion I brought it on vacation for a week on the West coast of Sweden where I trialled some paper positive and paper negative exposures. I did the development in Caffenol in the darkness of the communal shower. The resulting images were so-so since I had no tripod and papers with low ASA (3 and 0,15 respectively) combined with a maximum aperture of 8,8 made for several seconds long exposures even in daylight. Positive paper exposures need to be spot-on, or they go over-exposed. However, the experience was meaningful, learning the ropes of the camera and working real slow with paper exposures.


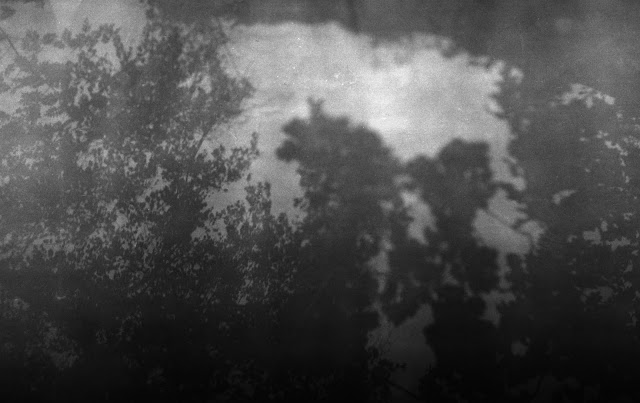
I made the beginner's mistake of choosing really constrasty subjects. The positive paper needs a lot of help with dealing with contrasts, I later read. I do like the above photo a lot, though.

These are 9x6-ish centimeters.

Below are the first successful 120 film exposures, though using the Mike Eckman 'pulling-out-the-backing-paper method of winding (which I do not at all recommend. Everything very easily goes all curly-whirly in the wrong places inside the camera). They are the only distinguishable exposures from two rolls of Kodacolor II 200ASA @ 50ASA, caffenol development (instant coffee and rosemary versions respectively).

This is the first successful 120 film exposure

Modding for winding

Recently I brought the 80A to the workshop at my job and drilled a hole and cut away some now obsolete sheet metal details so I could add a winder for 120 film. It took some fiddling and filing but now I have a working camera. I didn't (yet) make a hole to keep track of the numbers on the backing paper. I do some counting of turns instead when winding.

Below are the first exposures made after I added the winder knob.

Foma Retro Soft 320 ASA, developed in (well used) caffenol.

The above portrait was exposed on my colleague Lars' last day at work. (He's 63 but sure don't look it!) 2 seconds at f/8,8.

In the above picture you see where the Polaroid backing would be pulled out back in the day. Inside now is the take-up spool. The 'bar', top, is lifted, and the lock, below, is slid when the camera is opened.

Fast-forward two weeks and below follow my next result, from a roll of Lomography Earl Grey 100 ASA. Developed in fresh rosemary (instant coffee replacement) developer. Actually this is the only of three discernable exposures from the film. I was having trouble with my light metering, not being used to long(ish) exposures.

 Well, now I'm on my way with this camera. We have lift-off! I will make a window to see the frame count on the backing paper next. I'm excited to work in this format. Also I am excited to discover the world of longer exposures - and about getting to know my tripod.


I'm glad you came along! Comment here or at my Instagram. Visit the photography shop getOBphoto that I run at Etsy.


Comments

Popular posts from this blog

Celebrating 20 + Articles Elsewhere

  I have had a fun eight years burrowing deep into the world of film photography. Within a few weeks my 22nd contribution to 35mmc.com will be published. The website, which is run by a small group of people, publishes contributions from the global community of mostly film photographers. I have contributed sporadically with reviews and other articles on  photography related issues since May 2017. Almost as long as I have written about photography on this blog.   Disposable Cameras Canon QL17 Rangefinder Canon Demi half-frame Canon Lens Modding Olympus LE Camera Olympus Pen-F Yashica 50 mm Lens     Halina Lens Modding  4 Minolta Cameras Steinheil 50 mm Lens Instamatic Voigtländer Lens Modding Meikai Camera Ricoh Auto 35 Camera     Chaika Camera Modding Redscale Film   Hanimex 110 Camera  Canon 1980s Compacts Canon Prima Mini Camera Reviving Instamatic Cameras Focus-Free Digital Lens During this time I have also contributed a few art...

Chaika Leica

Well, here's a Chaika 2M that I bought from Alex Helios via Instagram.  It's a great full manual viewfinder half-frame camera. The wheel on the top is for shutter time selection, from B to 1/30th to 1/250th of a second. The square button on the front right of the camera is the release/exposure. The lens mounted on the camera in the picture is not the original Industar-69. The Chaika is a rare model compact camera since the prime lens is detachable. What is more is that it has M39 screw mount. But - like with the Paxette M39 system - you can't get focus with a lens from another M39 system. Unless you adapt the lens or - in this case - the camera (mount)! The Chaika mount is easily detached from the body by loosening four screws. If I want to mount the Leica thread mount M39 (LTM) lenses on the Chaika - which is my goal with this mod - I have to add 1.3mm to the mount. That is what is needed to change the camera's flange focal distance (FFD) from Chaika system to L...

Lomo-Modd-Orama

A Lomo Smena 8 camera with a faulty shutter. An Olympus Pen F camera. Part of a microscope adapter for the Pen. That's what I started out with. 45 minutes later I had a new lens! Mount The mount came off a microscope adapter. I got the adapter from my first (of two) attempts to buy an Olympus Pen F. There seem to be some unscrupolous ebay sellers around peddling useless Pens with microscope adapted prisms. Luckily - in hindsight - I got a microscope adapter with this first Pen. Which I now trashed when a Lomo Smena 8 without a future landed on my doorstep (figuratively speaking). Conversion / Havoc Smena I only knew the camera as a half-frame camera [Correction - it's a full frame camera!] called Smena 8 and hadn't thought to place it in Lomography-land until I read the name Lomo on the lens when it was already modded. Unwittingly I had tread the tiles of lomo-dom twice in as many weeks, also having put two rolls through a Praktica CX-1 which appears to be Gr...